Working with XPS to PDF Converter Expert
With the extremely simple and clear interface, you can quickly convert your XPS/OXPS files into PDF document. Please follow 3 steps to get it done.
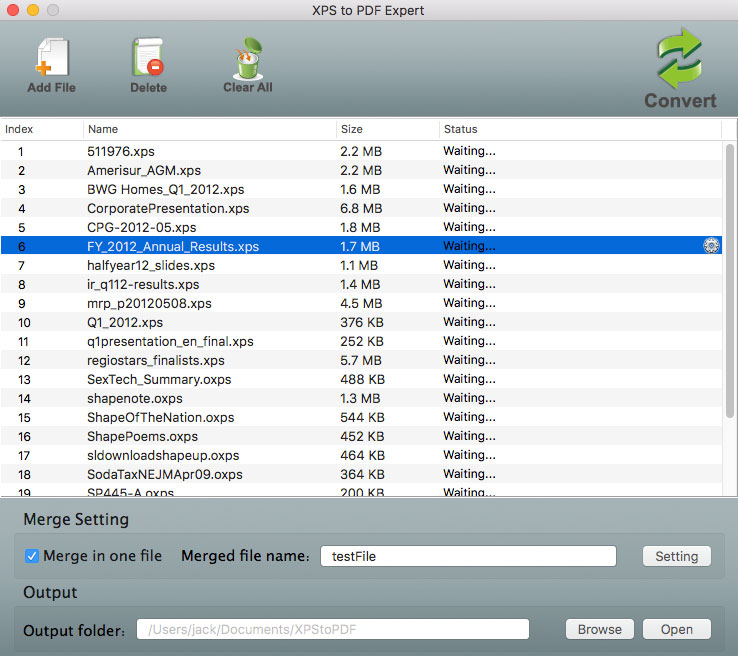
1. Add Files:
Click “Add files” button  to import the XPS files you want to convert, or click File-‐>Add Files on the menu to get started. You can import unlimited XPS files at one time. Click “Delete” to import the XPS files you want to convert, or click File-‐>Add Files on the menu to get started. You can import unlimited XPS files at one time. Click “Delete”  to remove one imported XPS file, click “Clear” to remove one imported XPS file, click “Clear”  to remove all XPS files. to remove all XPS files.
2. Set output options
After adding file, check ‘Merge into one file’ if you need to convert all the added files into one PDF. Uncheck it each file will be converted into an individual file after conversion. If you check ‘Merge into one file’, you can also set output file name.
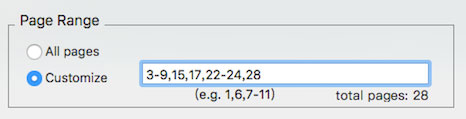
Click on the icon  in the line of the selected PDF file, you can customize the page ranges for the output file. The default options are All pages and iWork Pages(.pages) format. in the line of the selected PDF file, you can customize the page ranges for the output file. The default options are All pages and iWork Pages(.pages) format.
Choose one format and select Apply to all option, the format of current file setting will apply to all the files in the panel, you can select a particular page range to save your time. Click on the blank, type in the page numbers you want to convert, for example:1, 5-9, 12.
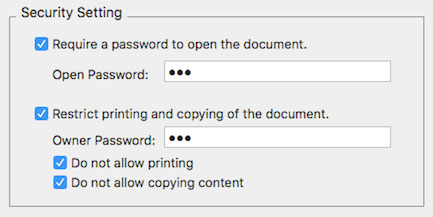
If you worry about the security of the PDF you create, add an open password or printing/copying restrictions to your PDF files. Please note that open password can’t be the same as the owner password.
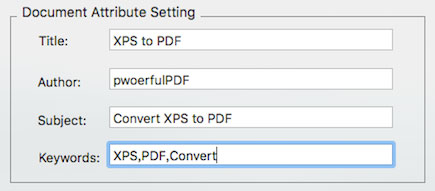
You can add meta information to the PDF you create. Such as Title, Author, Subject or even keywords.
3. Convert
After setting the output settings, click Convert  button to convert XPS to PDF. The conversion will be finished in seconds. Then you can click on the link in the document list to open the converted Pages file or click on the File-‐>Open Output Folder to open the converted output folder. button to convert XPS to PDF. The conversion will be finished in seconds. Then you can click on the link in the document list to open the converted Pages file or click on the File-‐>Open Output Folder to open the converted output folder.
|